Setting up a dedicated charging station for your devices can simplify your daily routine and keep your space neat. Whether at home or in the office, having a specific spot to charge phones, tablets, laptops, and other gadgets helps avoid clutter, reduces searching time, and promotes better device care.
In this guide, you’ll learn how to create an efficient and safe charging station tailored to your needs.
Why Set Up a Charging Station?
With multiple devices used daily, charging cables and adapters can quickly become a tangled mess. A charging station offers:
– Organization: Keeps cables and devices in one place.
– Convenience: Easy access and quick charging.
– Safety: Reduces the risk of damage from poor cable management.
– Aesthetics: Creates a clean, tidy work or living space.
Step 1: Choose the Right Location
Selecting the ideal spot is the first step.
– Consider accessibility: Pick a location where you frequently use your devices, such as a desk, kitchen counter, or bedside table.
– Power source availability: Ensure there are sufficient electrical outlets nearby.
– Ventilation: Choose a spot that doesn’t overheat for device safety.
– Avoid high traffic areas: To prevent accidental trips on cords.
Step 2: Assess Your Charging Needs
Make a list of the devices you regularly use and charge, including:
– Smartphones and tablets
– Laptops and e-readers
– Wireless earbuds or headphones
– Smartwatches and fitness trackers
– Portable power banks or battery packs
Knowing what you’ll charge helps determine how many ports and cables you need.
Step 3: Select Charging Hardware
Multi-Port USB Chargers
Using a multi-port USB charger reduces the number of wall plugs. Look for:
– Ample USB ports (4 to 10, depending on your needs)
– Fast charging capabilities (such as Quick Charge or Power Delivery)
– Safety certifications (UL, CE) to ensure quality
Wireless Charging Pads
If your devices support wireless charging, adding a charging pad or stand offers convenience without cable clutter.
Cable Management Accessories
To keep cables neat, consider:
– Cable organizers or clips
– Velcro straps
– Cable sleeves or tubes
– Charging station docks with built-in cable management
Step 4: Organize Charging Cables
Proper cable organization improves both safety and aesthetics.
– Label each cable by device type or user.
– Coil excess cable length to avoid tangles.
– Use clips or holders to anchor cables to the surface.
– Route cables behind furniture or along edges to keep them out of the way.
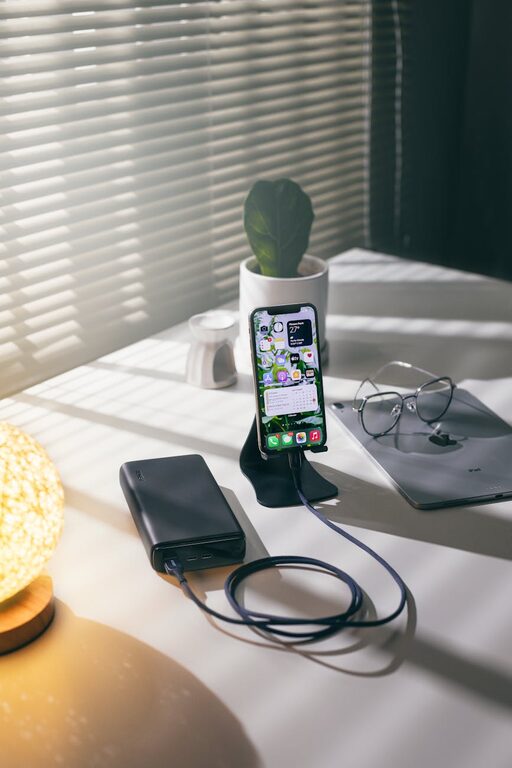
Step 5: Design Your Charging Station Setup
Here are some popular setup ideas:
Open Tray or Basket
Use a small shallow tray or basket to hold devices while charging. It keeps everything contained and visible.
Docking Station
Purchase or DIY a docking station with designated slots for each device, often with integrated charging functionality.
Wall-Mounted Organizer
A mounted board or pocket organizer saves desk space and can hold devices vertically.
Step 6: Setup and Test
– Connect the multi-port charger to power.
– Plug in all necessary charging cables or wireless chargers.
– Place devices in the station.
– Confirm all devices are charging correctly.
– Adjust cable lengths or device arrangement for easier access.
Safety Tips for Your Charging Station
– Use certified chargers and cables.
– Avoid overloading power strips or outlets.
– Keep liquids away from the station.
– Don’t cover devices to prevent overheating.
– Regularly inspect cables for damage.
Bonus: Enhance Your Charging Station
– Add a small LED lamp for nighttime use.
– Incorporate a clock or calendar to keep track of time.
– Add decorative elements like plants or photos for a personal touch.
Conclusion
Creating a dedicated charging station improves device management, reduces clutter, and enhances your workspace or living area’s functionality. By choosing an ideal location, selecting appropriate charging gear, and organizing cables thoughtfully, you can enjoy a neat, efficient setup tailored to your lifestyle.
Start today and experience the convenience of a well-planned charging station!